

You walk around the house one morning and notice a panel that has curled at the corner. A few more have faded to a chalky shade. Somewhere along the back wall, a section sounds hollow when you knock on it.
None of it looks like an emergency. Together, though, it raises the question every owner of an older house asks sooner or later: is it time for replacing vinyl siding, or can a few repairs buy another decade?
This guide walks through that decision in order. You will learn how to read the warning signs, what to check behind the panels, how the job is actually done,
and where the real risks hide (old paint, old materials, and water). It also covers permits, hiring, and how to choose what goes back on the wall. Where a figure comes from a source, it is linked. Where I could not verify something, I say so.
Why this decision matters more than it looks
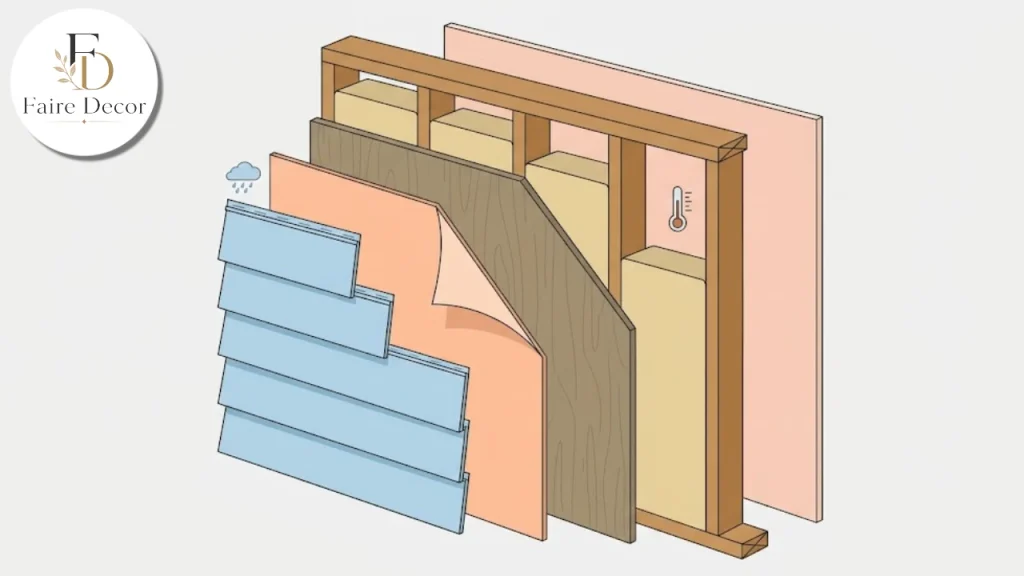
Siding is your home’s first layer of weather protection. Most of the work of keeping rain out is done by what sits behind it: the water-resistive barrier, the flashing around windows and doors, and the sheathing. The visible panels shed most of the water and shield that hidden system from sun and wind.
That is why replacing vinyl siding is rarely just a cosmetic project. The day the old panels come off is the one day you can see the condition of everything underneath. A good project uses that day to fix hidden problems. A rushed one buries them under a fresh coat of plastic.
Before you spend a cent, it helps to decide whether you are solving a looks problem, a performance problem, or both. The answer changes what you buy and who you hire.
Signs it is time to replace, not just repair
One cracked panel is a repair. A pattern is a replacement conversation. Bob Vila’s guide to replacing siding lists several signals worth taking seriously:
Cracking and rot. Soft siding that gives under gentle pressure may point to rot underneath.
Warping. Panels that bow, ripple, or pull away from the wall are no longer doing their job.
Mold growth. Green, yellow,w or black growth can mean water is getting past the siding.
Bubbling paint or wallpaper indoors. This can mean moisture is reaching interior walls.
Fading. On vinyl, heavy fading can mean the surface is wearing down.
Frequent repairs. If upkeep keeps adding up, replacement may cost less over time.
A sudden jump in energy bills. Aging siding may no longer insulate well.
Notice what is on that list and what is not. Fading alone is not a failure. A house with evenly faded, intact vinyl can keep protecting the wall. Moisture signs are the serious ones, because they suggest the damage has moved past the surface.
A simple walk-around you can do in twenty minutes
You do not need tools for a first pass. Walk the whole house on a dry day and look low, high,gh and around every opening.
Look along the wall at a low angle. Waves and bulges show up when you sight down the length of a wall.
Check the corners and the bottom edge. Splits and gaps collect here first.
Press gently on the lower boards and trim. Anything soft deserves a closer look.
Inspect around windows and doors. This is where water usually finds its way in.
Look inside. Check the walls below windows, the corners of rooms, and the basement or crawlspace for stains and damp smells.
Photograph everything. Dated photos help when you compare quotes or file a warranty claim.
If you find a few isolated problems and the walls feel dry, repair may be enough. If you find moisture signs in several places, plan on replacement and plan on opening up the wall.
How long should vinyl siding last?
The Bob Vila guide gives up to 60 years for vinyl, 20 to 40 for wood, up to 50 for fiber cement,ent and 40 to 70 for metal. Treat these as ranges rather than promises. Sun exposure, installation quality,lity and maintenance all move the real number.
One more point: age by itself is a poor trigger. A 25-year-old installation that was fastened correctly and has drywalls behind it can outlast a 10-year-old one that was nailed too tight. Quality of installation matters as much as the date on the calendar. The Vinyl Siding Institute’s installer brochure says poor installation is a leading cause of siding problems and can even void manufacturer warranties.
Repair, overlay , or full replacement?
Deciding between a patch and replacing vinyl siding across the whole house comes down to how far the damage has spread and what is behind it. You usually have three paths.
Repair. Swap individual panels, refasten loose sections, and reseal obvious gaps. This works when damage is local, and the wall behind it is sound. The catch is matching: older vinyl fades, so a new panel may stand out.
Overlay. Some owners install new siding over the old. It is quicker, but it hides what is behind the wall, and it can complicate flashing around windows and doors. Check your local code before considering it, and be especially cautious if you suspect moisture.
Full replacement. Strip the wall back to sheathing, repair what you find, install a proper water-resistive barrier and flashing, then hang new siding. It costs more and takes longer, but it is the only path that lets you inspect and fix the structure.
If you see signs of moisture, full replacement is the honest choice. Repairs on the outside cannot fix a wet wall on the inside.
Check for lead and asbestos before the first panel comes off
This section is the one people skip, and it is the one that matters most for your family. If your home predates the late 1970s, the layers under your vinyl may include materials that were later restricted.
Lead paint
Under the federal Renovation, Repair and Painting rule, EPA says that anyone paid to do work that disturbs painted surfaces in pre-1978 homes must be certified in lead-safe work practices, even sole proprietorships. EPA recommends hiring a lead-safe certified contractor for any renovation, repair,r or painting project in a pre-1978 home, and it offers a firm-locator tool.
The rule generally does not apply to work you do yourself in your own pre-1978 home. It does apply if you rent all or part of the home, run a childcare center there, or buy, renovate,te and sell homes for profit. EPA still recommends lead-safe practices if you do the work yourself.
Asbestos-cement siding
Some older homes have asbestos-cement shingles under, or instead of, other siding. A North Carolina state brochure on asbestos-cement siding explains that intact material is not considered a hazard because it keeps asbestos fibers bound within the cement. The risk comes when the siding is disturbed or broken. It advises against cutting, sanding, sawing,ing or abrading the shingles, breaking them apart with hammers or bars, or dropping or throwing them. It also recommends having suspect material tested by an accredited asbestos inspector, since you cannot identify it by sight.
Rules on removal and disposal vary by state and county. If you suspect asbestos, stop, get it tested, and call your state or local air-quality or environmental agency before any work begins.
This article is general information, not legal or safety advice. Confirm requirements with your local building department and a licensed contractor.
What the replacement process looks like
Knowing the sequence helps you judge a contractor’s quote and spot shortcuts. A properly run job looks like this.
Permits and planning
Many places require a permit for re-siding. For example, the city of Owatonna, Minnesota, requires a building permit for re-siding residential dwellings, along with product and manufacturer details and inspections. Your area may differ, so call the building department before you sign a contract. Ask who pulls the permit. The contractor normally should.
Removal and inspection
Old siding comes off, along with any damaged trim. Now the wall is open. Check the sheathing, and replace anything that is soft or stained. The Owatonna guidance notes that the extent of damage may require repairing or replacing insulation or studs, and that furring or leveling may be needed where the original siding was uneven.
This is also the moment to take photos for your records and to check windows and doors for leaks.
Water-resistive barrier and flashing
The barrier is the backup system. Under the same Owatonna guidance, one layer of No. 15 asphalt felt or another approved water-resistive barrier goes over the studs or sheathing. Horizontal courses lap at least 2 inches and joints at least 6 inches. Rips or holes must be repaired, and the barrier must lap flashings correctly.
Windows and doors need flashing tape and proper sequence so that water drains outward rather than behind the wall. The InspectAPedia installation FAQ describes the order as sheathing, housewrap, flashing tape, then J-channel and siding. Follow the manufacturer’s instructions and your local code, since details differ by product.
Trim and accessories
Corner posts, J-channel, and trim go on first because the panels slide into them. Aluminum trim needs aluminum or stainless fasteners, and accessories are fastened every 8 to 12 inches according to the Owatonna guidance.
Hanging the panels
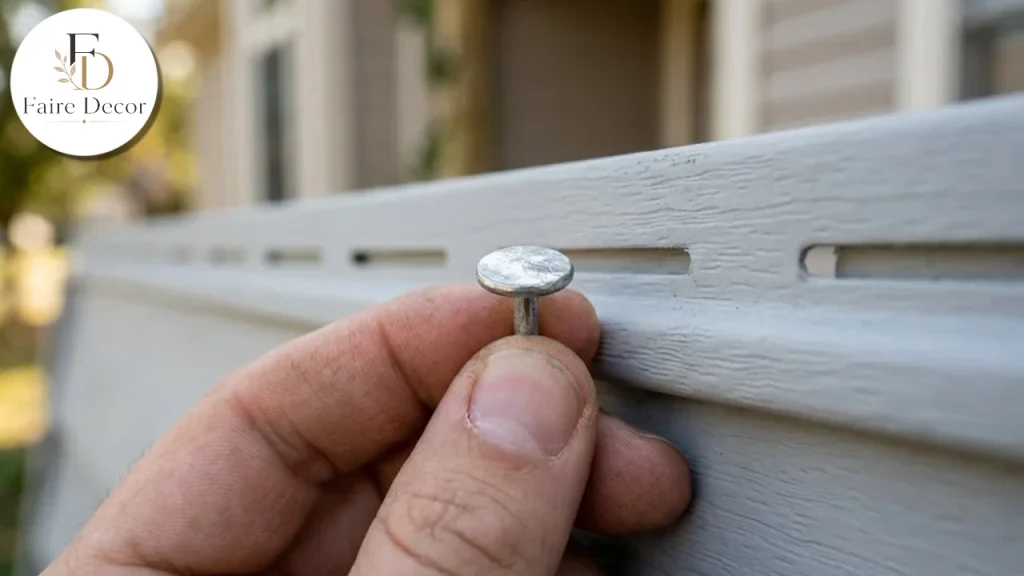
This is where installation quality shows. The key principle is that vinyl moves with temperature. According to the Owatonna guidance:
- Center each fastener in its slot so the panel can move.
- Leave about 1/32 inch between the nail head and panel, roughly a dime’s thickness.
- Do not nail tightly, and do not face-nail through the panel.
- Space fasteners no more than 16 inches apart on horizontal panels, and check your manufacturer’s instructions for the exact figure.
- Leave at least 1/4 inch at openings and stops, and 3/8 inch when installing below 40°F.
- Do not caulk the overlap joints or panel edges where they enter corner or J-trim receivers.
Vinyl can expand or contract 1/2 inch or more over a 12-foot-6-inch length, according to the same source. A panel nailed tight cannot do that, so it buckles. If you see waves in a freshly installed wall, tight nailing is a likely cause.
Final inspection
After all siding, soffit, fascia, and caulking are done, a final inspection may be required. In Owatonna’s guidance, skipping required inspections can mean an 8-foot-by-8-foot section has to be removed so inspectors can see behind it. Keep the manufacturer’s installation instructions on site and keep your own photos of each stage.
Choosing what goes back on the wall
Replacing vinyl siding with more vinyl is the simplest path, but it is not your only option. Here is how the common choices compare, using the lifespans cited earlier from Bob Vila and general trade knowledge.
| Material | Typical lifespan cited | Where it fits | Watch for |
|---|---|---|---|
| Vinyl | Up to 60 years | Budget-conscious, low-maintenance projects | Expansion gaps and careful fastening |
| Fiber cement | Up to 50 years | Owners who want a masonry or wood look | Heavier panels, more labor, dust-safe cutting |
| Wood | 20 to 40 years | Historic or custom looks | Regular sealing or painting |
| Engineered wood | 100+ years (as cited) | Wood look with less upkeep | Follow manufacturer’s moisture details |
| Metal | 40 to 70 years | Durable, modern or rural styles | Corrosion near salt air for aluminum |
I could not verify current installed costs for your region, so I have not printed price tables here. One Canadian price guide I opened was in Canadian dollars and would mislead most readers elsewhere. Ask for at least three itemized quotes from local installers.
Match the siding to the house
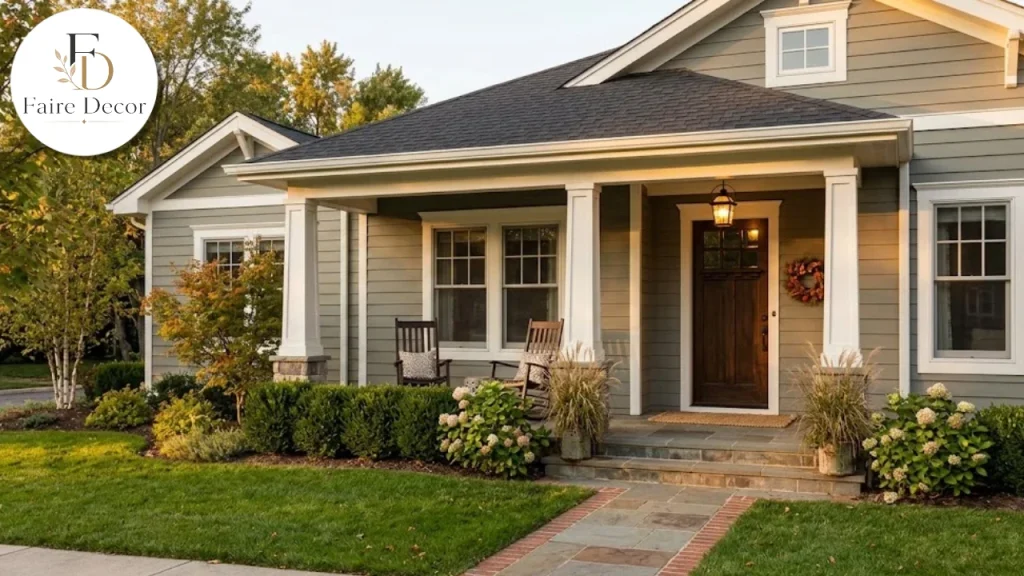
Architecture should steer the decision. A low, horizontal ranch-style home usually looks best with simple lap profiles. A Spanish-style home calls for a smooth, stucco-like finish rather than heavy wood grain. If you plan to expand, think about how new walls will meet old ones, and read about home additions before you pick a profile you cannot match later.
Color, trim and curb appeal
New siding is one of the biggest color decisions you will make outdoors. Samples matter. Look at them in morning and evening light, and against your roof, brick,k and trim. Muted greens and grays tend to pair well with natural landscaping, and our guide to gray-green paint is a good way to test undertones before you commit.
Small details finish the look. A refreshed front porch draws the eye to the entry, and well-chosen awning windows can change how a wall reads. If you have a carport or a balcony, plan trim and railings together so everything looks like one design. Our balcony railing ideas can help you coordinate those finishes.
Before you fall for a deep, dark shade, ask the manufacturer whether that color is approved for your product and covered by the warranty. I could not verify a general rule here, so get the answer in writing for the exact color you choose.
How to hire the right installer
A great product installed badly is a bad product. Take your time here.
Ask for certification. The Vinyl Siding Institute’s certified installer program requires at least two years of experience, a training course,se and an exam, with recertification every five years, according to the VSI brochure.
Verify the license and insurance. Ask for proof of both, then check it with the issuer.
For pre-1978 homes, ask for lead-safe certification. EPA’s firm locator can confirm it.
Get itemized written quotes. They should name the product, the barrier, flashing, trim, disposal, and who pulls the permit.
Ask how they handle hidden damage. A good contractor explains in advance how rotted sheathing is priced and approved.
Ask about warranty. Ask what voids it, and get both the manufacturer’s and the installer’s terms in writing.
Be wary of pressure. “Sign today for a special price” is a reason to slow down.
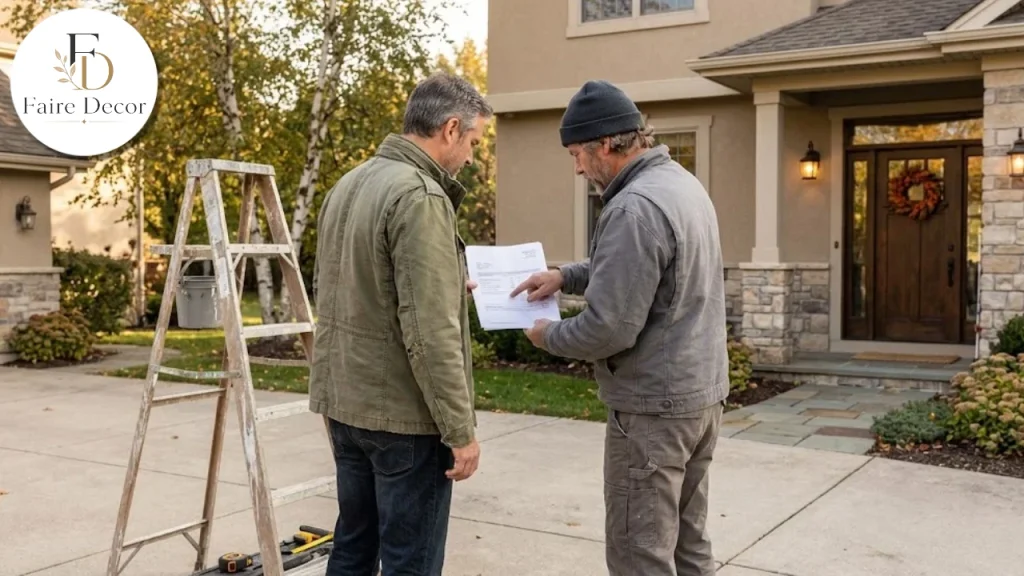
Walk the job site on day one and on the day the wall is open. Seeing the sheathing yourself is the best protection you have.
Common mistakes to avoid
Nailing too tight. It causes waves and buckles as temperatures change.
Skipping the barrier. Siding alone does not make a wall watertight.
Caulking the wrong places. Do not caulk overlap joints or panel edges in the receivers, because the panels need to slide.
Covering damage. An overlay can trap a wet wall.
Ignoring old-house hazards. Test before you disturb unknown materials.
Choosing by price alone. The cheapest quote often leaves out flashing, trim, or disposal.
Forgetting permits. Unpermitted work can create trouble when you sell.
Is DIY an option?
Homeowners with strong carpentry skills do install siding themselves, and the technique is not mysterious. But the margin for error is smaller than it looks. Tight nailing, a missed flashing detail or a skipped barrier will not show up on day one.
It shows up two winters later as waves, stains, or a soft wall. Poor installation can also void a manufacturer warranty, as the VSI brochure notes.
If you do take it on, read the manufacturer’s installation instructions cover to cover, confirm permit rules first, and consider hiring a pro just for windows, door,s and corners, where water entry is most likely. For a pre-1978 house, think hard before disturbing old paint without lead-safe practices.
A realistic timeline and budget mindset
A typical project starts with measuring and ordering. Lead times and job length vary by region, season, and house size, so I will not guess at numbers. Weather, hidden repairs,irs and trim details can all stretch a schedule. Ask your contractor for a written schedule and a plan for rain delays.
Prepare the property before crews arrive
A little preparation protects both your home and your relationship with the crew.
Clear the perimeter. Move furniture, grills, planters,ters and anything breakable away from the walls.
Trim back plants. Shrubs and vines near the wall make removal harder and are easy to damage.
Take wall hangings down. Pictures and shelves on interior walls can shake loose from vibration.
Plan for pets and kids. Debris and nails are a hazard, so keep pets and children away from work areas.
Agree on a cleanup routine. Ask for a magnetic sweep of the lawn and driveway for stray nails at the end of the job.
Reading your quote line by line
Two quotes can look similar and still describe very different jobs. Compare them line by line instead of by total.
| Line item | What to look for |
|---|---|
| Product | Brand, profile, thickness and color named exactly |
| Barrier and flashing | The barrier type and flashing tape for windows and doors |
| Removal and disposal | Old siding hauled away, with a plan for hazardous materials if testing finds any |
| Trim and accessories | Corners, J-channel, soffit and fascia included or listed as extras |
| Hidden repairs | A stated price per sheet of sheathing or per hour for rot repair |
| Permit and inspections | Who pulls the permit and who is present for inspections |
| Warranty | Manufacturer terms and the installer’s workmanship terms, in writing |
If a quote is vague on any of those rows, ask for it in writing before you compare totals.
Budget a contingency for hidden repairs. If the sheathing is sound, you will not need it. If it is not, you will be glad you set it aside. A small reserve turns a surprise into a line item. For ideas on planning a renovation with fewer surprises, see our renovation tips guide and our collection of home decor ideas that actually work.
Care after installation
New siding is low-maintenance, not no-maintenance. Rinse it once or twice a year with a garden hose and a soft brush. Keep shrubs trimmed back so air can move along the wall. Check caulk around windows and doors each year, and look for loose panels after storms. Keep your project photos, product labels,els and warranty papers in one folder. If you ever make a claim or sell the house, that folder pays for itself.
Quick checklist before you sign
Use this list as a final gate before committing to replacing vinyl siding on your own home.
You know why you are replacing: moisture, damage, age or looks.
You have checked for lead paint and asbestos if the house is older.
You have three itemized quotes and the contractor’s proof of license and insurance.
The permit is handled and inspections are scheduled.
The quote names the barrier, flashing, trim, fasteners,and disposal.
You have picked a color from samples seen in real light.
The warranty terms are in writing.
A contingency is set aside for hidden repairs.
Final thoughts on replacing vinyl siding
Replacing vinyl siding pays off when it fixes the wall, not only the look. Read the signs, open the wall, and make sure what is behind the panels is dry and sound before the new ones go up. Choose an installer who can explain the barrier, the fflashingng and the fastening without hesitation, and keep records of everything. Do those things and a well-made wall can serve your home for decades.
Confirm local requirements with your building department and a licensed contractor before you start.
FAQs:
How do I know if my vinyl siding needs replacing?
Look for soft or rotted areas, warping, mold, bubbling paint inside, and frequent repairs. Moisture signs matter most. Heavy fading alone is not proof of failure.
Can I put new siding over old vinyl?
Some installers overlay, but it hides what is behind the wall and can complicate flashing. Check local code, and avoid it if you suspect moisture.
Do I need a permit for replacing vinyl siding?
Many places require one. Owatonna, Minnesota, requires a building permit for re-siding homes. Call your local building department to confirm.
Is lead paint a concern when removing old siding?
It can be in homes built before 1978. EPA says paid contractors disturbing paint in those homes must be lead-safe certified. Ask your contractor for proof.
What if I think my old siding contains asbestos?
Dnot,t cut, sand or break it. Have it tested by an accredited inspector and call your state or local environmental agency before work starts.
Why does new vinyl siding wave or buckle?
Tight nailing is a common cause. Fasteners should sit centered in the slots with a small gap under the head so the panel can expand and contract.