

Most people begin exterior remodeling the same way: they pull into the driveway one evening and see the house the way a stranger would. The paint is tired. The garage door has a dent. One window never closes quite right. Then comes the harder question. Where do you start, what does it cost, and how do you avoid paying twice for the same wall?
This guide answers those questions in order. You will see how to judge what your house actually needs, how to sequence the work so one project does not undo another,
which upgrades tend to recover more of their cost, and where permits and old-house hazards can trip you up. Wherever a number or rule comes from a source, it is linked. Where I could not verify something, I say so.
Start with the problem, not the paint color
It is tempting to open with colors and styles. Resist that for a day. A wall that looks bad and a wall that is failing are different problems, and they call for different budgets.
Spend an afternoon sorting your list into three buckets:
Protection. Anything that keeps water out: roof edges, flashing, siding, window and door seals, gutters.
Performance. Anything that changes comfort or energy use: windows, exterior doors, insulation details, air sealing.
Appearance. Anything that changes how the house looks: color, trim, porch details, lighting, landscaping.
Protection comes first, because a beautiful finish on a leaking wall is wasted money. Performance comes second, because it is cheaper to upgrade windows while the wall is already open. Appearance comes last, partly because it is the most flexible and partly because it is the easiest to get right once the structure is sound.
Walk the house like an inspector
A basic condition survey costs nothing. Go around the exterior on a dry day and take dated photos of everything.
Roof edges and gutters. Look for overflow stains, sagging runs and loose sections.
Walls. Sight along them for waves, cracks, soft spots, and stains.
Windows and doors. Check seals, sills,s and the wood or caulk around the frames.
Foundation line. Look for soil, mulch,ch or plants piled against the wall.
Porch, deck,eck and steps. Press on boards and railings to feel for movement or softness.
Interior clues. Look for stains below windows and along ceilings, which can point to exterior leaks.
Mark each issue as repair, rep, or monitor. This list becomes your scope of work and your best defense when quotes arrive with vague line items.
Put things in the right order
The biggest hidden cost in exterior remodeling is doing steps out of sequence. Replace a window after the siding goes up and you may have to cut into brand new material. Paint before repairs, and you will paint over the damage.
A sensible order, working from the top of the house down, looks like this:
Structural and moisture repairs. Fix rot, leaks,s and drainage problems before anything cosmetic.
Roof and roof edges. Water runs downhill, so protect the top first.
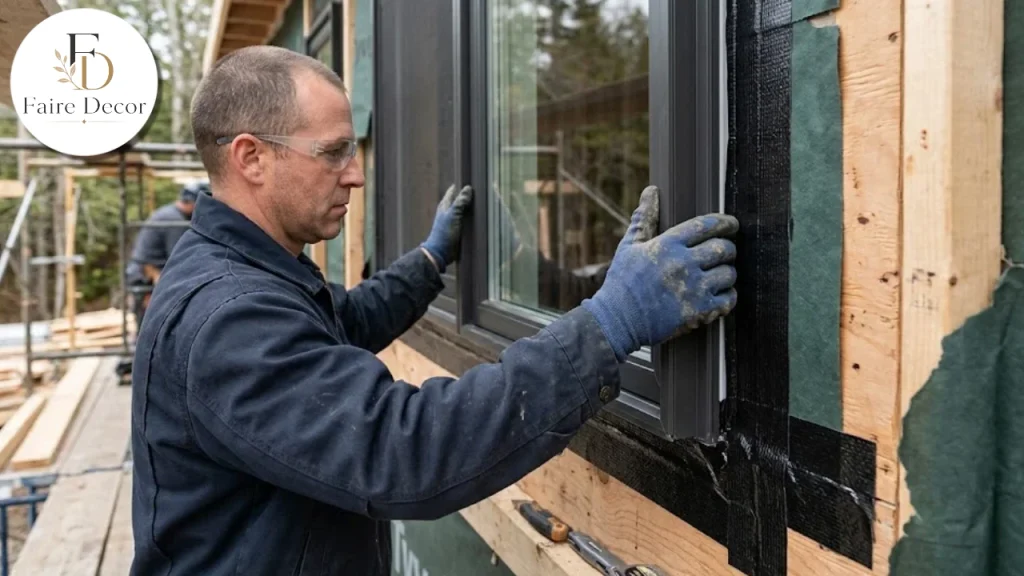
Windows and exterior doors. Replace them before new wall cladding so flashing can integrate with the wall.
Siding, trim and wall cladding. Cover the walls once the openings are settled.
Porches, decks, railings and steps. These attach to the finished wall and need proper flashing.
Paint, hardware,re and lighting. Finish surfaces last to avoid damage from other trades.
Landscaping and hardscape. Do it at the end so heavy equipment does not trample new plants.
Order matters most around openings. A forum discussion among building professionals on Green Building Advisor notes that how trim and siding meet changes where head flashing sits over windows and doors, and that the flashing needs to extend back to the sheathing
and be overlapped by the water-resistive barrier. That thread is opinion, not a code, but it shows why a contractor should be able to explain the sequence around every opening before the job starts.
Know which projects tend to recover cost
Not every upgrade returns the same share of what you spend. Zonda’s 2024 Cost vs. Value report is a useful reference because it compares typical job cost with estimated resale value. Here are the exterior projects the page lists. These are national averages from that report, so your results will differ.
| Project | Job cost | Value at sale | Cost recouped |
|---|---|---|---|
| Garage door replacement | $4,513 | $8,751 | 194% |
| Entry door replacement (steel) | $2,355 | $4,430 | 188% |
| Grand entrance, upscale (fiberglass) | $11,353 | $11,054 | 97% |
| Siding replacement (fiber-cement) | $20,619 | $18,230 | 88% |
| Deck addition (wood) | $17,615 | $14,596 | 83% |
| Siding replacement (vinyl) | $17,410 | $13,957 | 80% |
| Deck addition (composite) | $24,206 | $16,498 | 68% |
The report’s editor said exterior replacement projects “continue to make the most sense” for adding resale value, in contrast to discretionary interior projects. Read the pattern, not the exact numbers. Smaller, visible, front-of-house upgrades such as doors came out strongest in that repo ,
while bigger projects recovered less of their cost. These are 2024 figures, and I did not find a newer edition to confirm, so check the current report before using them in a budget.
Resale is only one reason to remodel. If you plan to stay for fifteen years, protection and comfort may matter more than a resale percentage.
Doors and entries: small spend, big first impression
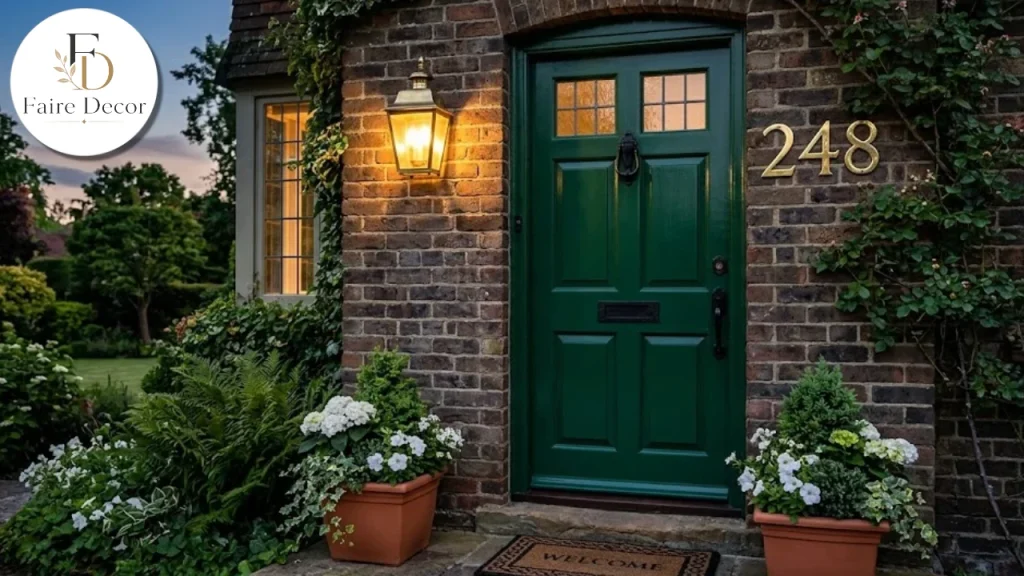
The front entry is the closest part of the house to every visitor. A weathered door or a dated garage door drags down the whole facade. In the Zonda report above, garage door and steel entry door replacements led the list, which tells you that fixing the parts people see first can be smart.
Practical tips for entries:
Match the door to the house. A traditional home tends to suit paneled doors; a modern one suits flat slab styles with simple hardware.
Think about the whole entry. Lighting, house numbers, a doormat and plants complete the picture.
Check the opening. If you keep the same opening size, replacement is simpler than changing the frame.
For ideas on pulling the entry and the interior together, see our guide to front door and entryway combos. If your home has a porch, a refreshed front porch can do a lot of the work of exterior remodeling without touching the main walls.
Windows: comfort, light and savings
Windows are both a comfort item and a style item. ENERGY STAR says replacing single-pane windows with certified ones lowers household energy bills by an average of up to 13 percent nationwide. That is an upper-end average for a specific starting point, not a promise for your house. If your windows are already double-pane, the gain will be smaller.
Two points from ENERGY STAR matter when you shop:
Certification depends on climate zone. Requirements for U-factor and for solar heat gain coefficient, where it applies, vary by zone. Find your zone and look for the zone label next to the NFRC label.
Installation matters as much as the product. ENERGY STAR warns that even the best windows can be drafty if poorly installed, and recommends following manufacturer instructions and checking installer references.
Style counts too. Casement, double-hung, and awning windows each change how a wall looks and how air moves through the room, so choose the type with the room in mind, not just the facade.
If your house is in a historic district, windows may need extra approval. St. Louis, Missouri, for example, requires review of windows and doors in historic districts even when no building permit is needed. Your city may differ, so ask before ordering anything.
Siding and wall cladding: the biggest visual lever
Walls make up most of what you see, so siding is usually the largest line in an exterior remodeling budget. The choice is a balance of cost, upkeep, durability, and style.
Vinyl is the most common budget-friendly option and needs little upkeep. Installation quality is critical, because panels must be allowed to move with temperature.
Fiber cement gives a wood or masonry look. In the Zonda numbers above, it recouped slightly more than vinyl, though it costs more upfront.
Wood and engineered wood suit custom or traditional looks and need a sound paint or stain routine.
Metal can be durable and works well on modern or rural styles.
Whatever you choose, plan for the layers behind it. A water-resistive barrier, flashing tape at openings,s and a clean sheathing surface do the real work of keeping water out. If your house predates 1978, read the next section before any demolition begins.
Match the siding profile to the house, too. A low ranch-style home tends to look best with simple horizontal lines, while a Spanish-style home suits smooth, stucco-like finishes. Matching style to architecture usually looks better than chasing a trend.
Old-house hazards: lead and asbestos
If your house is old, demolition can disturb materials that were later restricted. Two stand out.
Lead paint. EPA says that anyone paid to do work that disturbs painted surfaces in pre-1978 homes must be certified in lead-safe work practices. EPA recommends hiring a lead-safe certified contractor for renovation, repair,ir or painting in those homes. The rule generally does not apply to work you do yourself in your own pre-1978 home, though EPA still recommends lead-safe practices. It does apply if you rent the home, run a childcare center there, or renovate to sell for profit.
Asbestos-cement siding. A North Carolina state brochure explains that intact asbestos-cement siding keeps fibers bound in the cement, and that the risk comes when it is disturbed or broken. It advises against cutting, sanding, sawing,ing or breaking the shingles, and recommends testing suspect material through an accredited inspector. Rules on removal and disposal vary by state and county, so call your local environmental agency first.
General information only, not legal or safety advice. Confirm requirements with your local building department and a licensed contractor.
Permits, HOAs and historic districts
Permit rules differ from place to place, so treat any example as a prompt to call your own building department. Here is what one city says. St. Louis, Missouri, lists the following in its residential permit guidance:
Installing new vinyl, aluminum, or steel siding with no change to existing openings is listed as not requiring a permit.
Replacing or repairing existing windows and doors is exempt when no modification is made to the opening.
Roofing needs a permit for a new roof that is not a replacement of like material, or when more than 25 percent of the sheathing is removed and replaced.
Decks, porches, and retaining walls require a permit, and so do new fences.
In historic districts, items such as windows, doors, painting, gutters, and fences need approval from the preservation office even when no building permit is needed.
Flood areas may require a separate development permit.
Another city, Owatonna, Minnesota, takes a stricter approach to re-siding and requires a building permit, as its vinyl siding guidelines explain. Same project, different rule. That gap is the whole point: never assume.
Also check your homeowners association rules for color, material,l and fence limits. I did not find a general source for HOA rules, since they are set by each association, so read your own covenants.
Add space without losing the style
Some exterior remodeling projects change footprint, such as a room, a porch, or a covered parking area. These raise the stakes on design and permits, so plan them early.
- Additions. New walls should meet old ones with matching rooflines, siding, and trim. Our guide to home additions covers how to keep the old and new parts reading as one house.
- Carports and covered parking. A carport can add function with a lighter footprint than a garage. Check setbacks and local rules first.
- Balconies and rails. Safety and code matter most here. See our balcony railing ideas, then confirm height and spacing rules with your building department.
Water management: gutters, grading,g and drainage
Water is the quiet enemy of every exterior. Before you spend on finishes, look at where rain actually goes. This is general good practice rather than a sourced standard, so confirm details locally.
Gutters and downspouts. They should collect roof runoff and carry it away from the foundation. Overflow stains on the wall are a clue that something is clogged, sagging, or undersized.
Grading. Soil near the house should slope away from the walls, not toward them.
Plants and mulch. Keep beds from piling against siding, where they hold moisture against the wall.
Splash zones. The bottom of a wall takes the most abuse, so check it often.
A bad drainage setup can undo a new wall quickly. If you see pooling after storms, fix it in phase one, not as an afterthought.
Light, landscape and the finishing layer
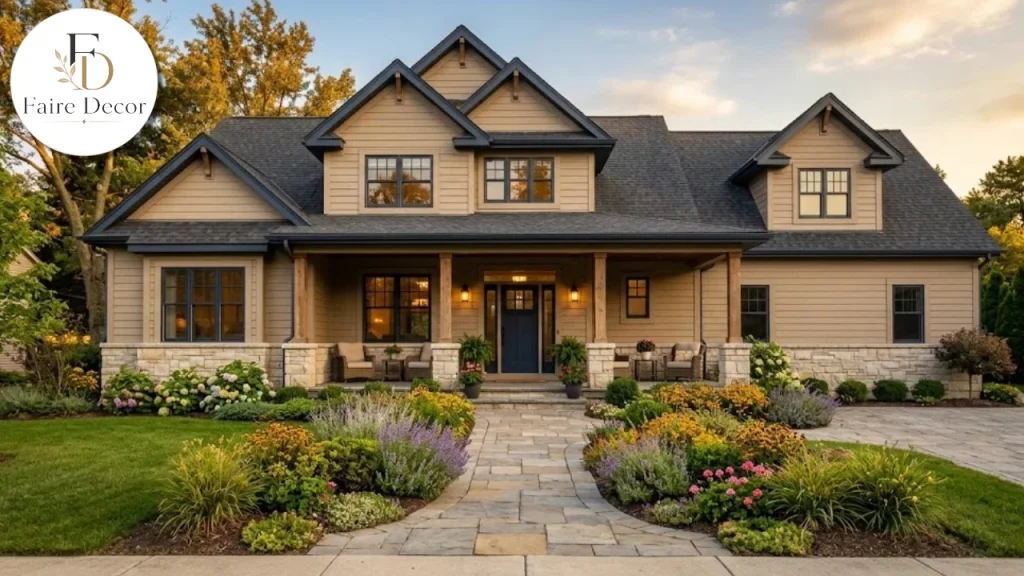
Once the structure is sound, the final layer is what people notice at dusk and from the street. Think of it as editing rather than adding.
Lighting. Warm, shielded fixtures near the door and garage improve safety and show off texture on the wall without glare.
House numbers and mailbox. Large, readable numbers help visitors and emergency services, and they are cheap to upgrade.
Planting. Choose plants for their mature size, so they do not crowd the wall or windows in three years.
Paths and steps. A clear, even path makes the entry feel welcoming. Fix trip hazards while you are at it.
Fences and gates. Keep the style consistent with the house, and check height and permit rules before you build.
These touches are where exterior remodeling starts to feel personal, so give them as much thought as the big materials.
Choosing color and finishes
Color is where personality shows up, and it is also where many people regret a fast decision. A few habits help.
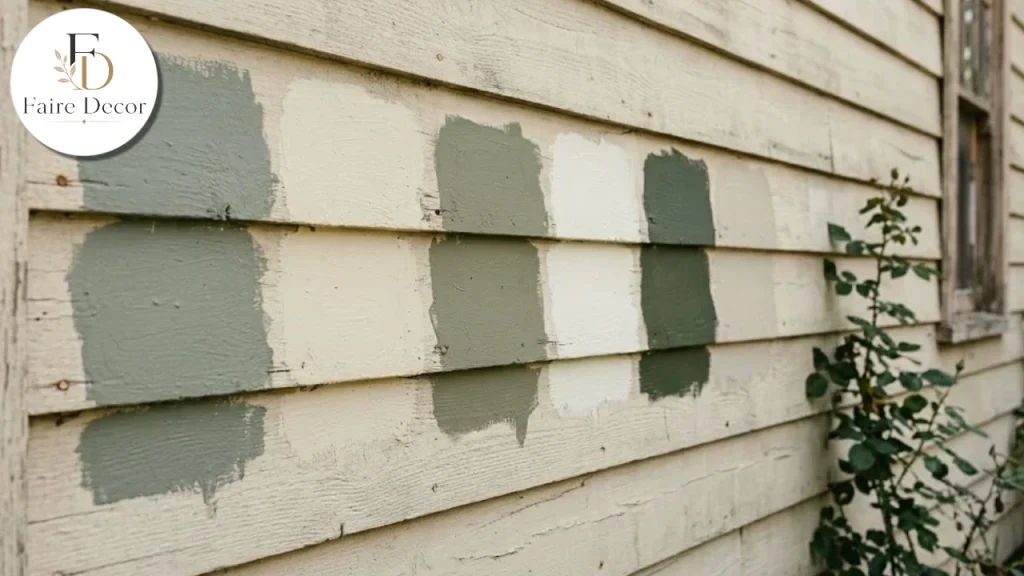
Test big samples. Paint a large patch on the actual wall and view it in morning, midday,y and evening light.
Look at fixed elements. Roof, brick, stone,e and driveway colors will not change, so the new palette has to work with them.
Pick a trim contrast. Trim a shade lighter or darker than the walls frames the house without extra fuss.
Repeat colors. Echo the door color in planters or a mailbox for a cohesive look.
If you like soft natural tones, try testing undertones with our guide to gray-green paint before committing. If you are unsure whether a dark color is approved for your siding product, ask the manufacturer and get the answer in writing, since warranties may have conditions.
Building a budget that survives surprises
Exterior jobs are known for surprises, mostly because walls and roofs hide things. A good budget has three layers.
Base scope. What you planned, priced from itemized quotes.
Contingency. A reserve for hidden rot, flashing fixes,es or code upgrades. How large it is depends on the age of the house and what you find, so ask your contractor to explain their assumptions.
Finishing extras. Lighting, landscaping, and decor that can wait if money gets tight.
I did not find a verified, current regional price source I could stand behind, so this article does not print cost-per-square-foot numbers. The Zonda table above shows national averages from 2024 for specific projects and nothing more. Ask for at least three written quotes from local contractors who have done similar jobs.
Hiring the right contractor
Quality varies enormously, and so does communication. Use these checks.
Verify license and insurance. Ask for proof and confirm with the issuer.
Ask for lead-safe certification on any pre-1978 home.
Request references and recent photos of jobs similar to yours.
Compare itemized quotes line by line, not by bottom line. They should name products, barrier, flashing, trim, disposal and who pulls the permits.
Ask how hidden damage is handled. The answer should include how it is priced and approved.
Get warranty terms in writing, both from the manufacturer and from the installer.
Be wary of pressure. A quote that expires today is a reason to slow down.
For product installation, ENERGY STAR’s advice applies broadly: follow the manufacturer’s instructions and hire people trained for the product you chose.
Mistakes that cost the most
Starting with paint. Fix leaks and rot first, or the finish will fail.
Ordering before measuring. Windows and doors need exact openings, so confirm sizes before you buy.
Ignoring drainage. Gutters, grading, and downspouts decide whether water ends up inside your wall.
Skipping permits. Unpermitted work can complicate a future sale.
Choosing on price alone. The lowest quote often leaves out flashing, trim, or disposal.
Forgetting the whole picture. A new door beside faded siding makes both look worse.
Phase it if you cannot do it all at once
Not every home can afford a single big project. A phased plan can work, as long as each phase leaves the house weather-tight.
Phase 1: repairs, drainage, roof edges, and any rot.
Phase 2: windows and exterior doors, ideally together with the wall that surrounds them.
Phase 3: siding and trim.
Phase 4: porch, deck, landscaping and finishing touches.
Keep a binder or digital folder with photos, product labels, receipts,s and warranties. For more ideas on planning a renovation with fewer surprises, see our renovation tips guide, and for finishing touches, take a look at these home decor ideas that actually work.
Final checklist before you start
You have sorted the work into protection, performance and appearance.
You have photographed the existing conditions.
You have checked for lead paint and asbestos if the house is older.
You have confirmed permit, HOA, and historic-district rules.
You havea sequencet and a contingency.
You have three itemized quotes and verified licenses and insurance.
You have chosen colors from large samples viewed in real light.
You have warranty terms in writing.
Final thoughts on exterior remodeling
Good exterior remodeling is less about big gestures and more about order and honesty. Fix what protects the house first. Choose products suited to your climate and your architecture. Check the rules before you build, and hire people who can explain their flashing, their fastening and their schedule without hesitation. Do that, and the house you pull up to each evening will look better, perform better, and hold its value longer.
Confirm local requirements with your building department and a licensed contractor before you start.
FAQs:
What should I do first in exterior remodeling?
Fix protection problems first: leaks, rot,drainageg,e and roof edges. Cosmetic work like paint and landscaping comes last.
Which exterior projects recover the most cost?
In Zonda’s 2024 Cost vs. Value report, garage door replacement (194%) and steel entry door replacement (188%) led. Siding replacement recouped 80% to 88%. These are national averages.
Do I need a permit to replace siding or windows?
It depends on your city. St. Louis lists like-for-like siding, window, and door replacement as exempt, while Owatonna, Minnesota, requires a permit for re-siding. Call your building department.
Are new windows worth it for energy savings?
ENERGY STAR says certified windows cut energy bills by an average of up to 13 percent when replacing single-pane windows. Gains are smaller if you already have double-pane windows.
Is lead paint a concern for exterior work?
It can be in homes built before 1978. EPA says paid contractors disturbing paint in those homes must be lead-safe certified.
Can I do exterior remodeling in phases?
Yes, if each phase leaves the house weather-tight. Start with repairs and drainage, then windows and doors, then siding, then finishes.